Oryx by Contextual AI
Integrate your application with Contextual AI agents — seamlessly, from interface to proxy, fully customizable and unbranded.
What is Oryx?
Oryx is a native UI integration library for Contextual AI agents, built to bring agent experiences directly into your product. It handles the connection, logic, and data flow, so you can focus purely on your design and user experience.
- Fully unstyled — ready to adapt to any branding, design system, or CSS framework.
- Fully composable — seamlessly integrate with your own UI components.
- Batteries included — built-in proxy enforces best engineering and security measures.
- Built for the best developer experience — crafted by our top engineers.
The oryx library includes two packages:
@contextualai/oryx-react— Unbranded React primitives for building agent UI.@contextualai/oryx-proxy-node— Node.js proxy for proxying API requests.
Oryx may not yet support your preferred language or framework; however, you're welcome to translate Oryx's logic into desired language or framework using AI.
Step 0: Explore the complete working example
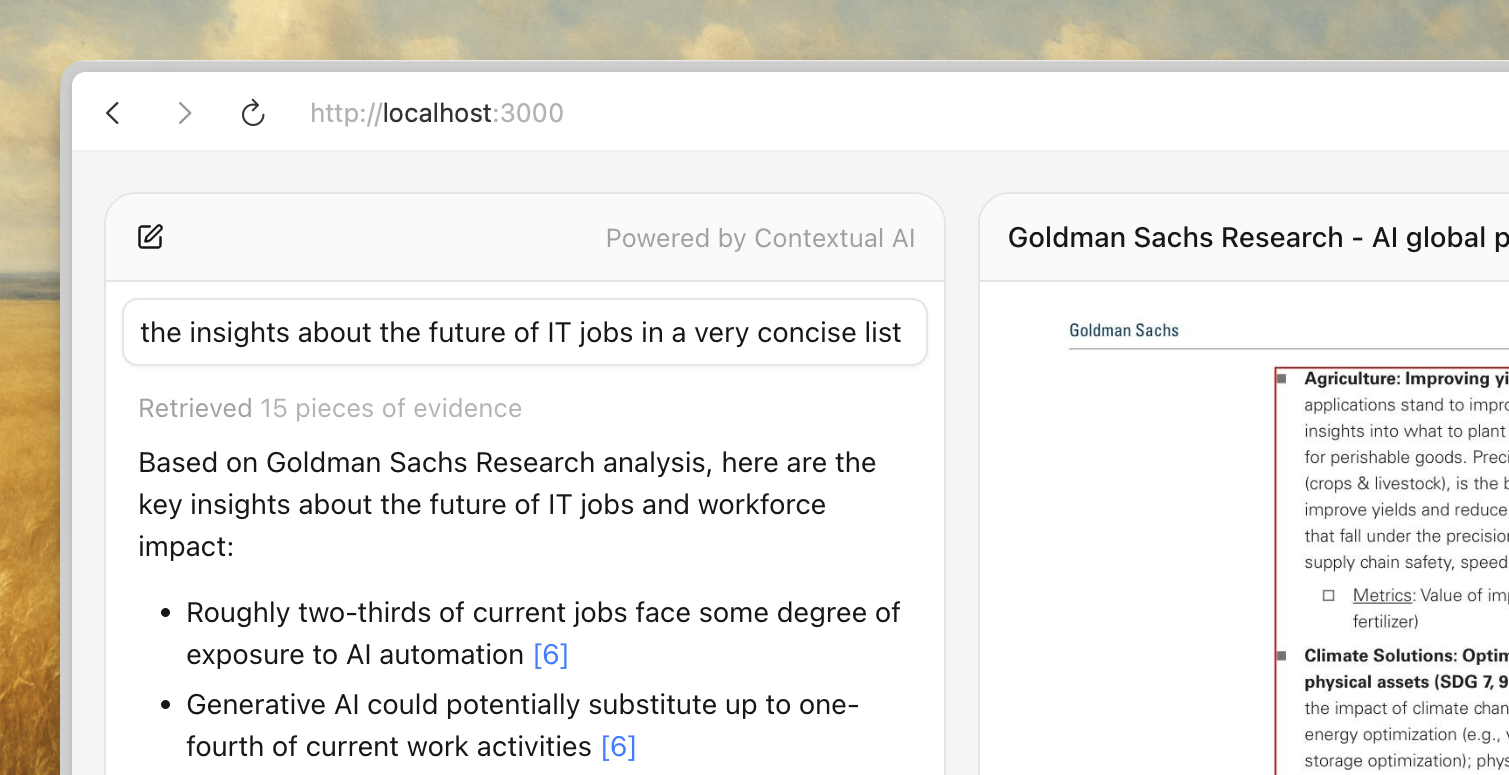
If you prefer hands-on exploration over reading step-by-step guides, we've prepared a complete working example that you can clone and run locally. It covers everything from fetcher setup to proxy configuration, with a styled chat interface ready to go.
The steps 1-4 walk through integrating Contextual AI agents into your application. Feel free to skip ahead and reference the example code if that suits you better.
Step 1: Installation
For the first half of the guide, you only need @contextualai/oryx-react. The second package @contextualai/oryx-proxy-node will be used later on for shipping your application safely in production.
@microsoft/fetch-event-sourceis not required but recommended for handling SSE connections. GET request also works as long as it is proxied into POST request when sending to Contextual AI's API, but it has limitation on the search params length. Therefore, it is recommended to start SSE connection using a POST request, which is supported by@microsoft/fetch-event-source.
bash
pnpm install @contextualai/oryx-react @microsoft/fetch-event-source
Step 2: Create a fetcher for SSE streaming
Fetcher is for mapping the state management logic onto the SSE streaming connection. This is a key part of keeping the flexibility so you can use any SSE library you want, not limited to @microsoft/fetch-event-source, and we are using it here for an example.
During development, the
/query-endpointin the example below could directly point to Contextual AI's Query API. In production, however, we strongly recommend using a proxied endpoint to prevent exposing your API key in client code. To learn more, check out the productionization step.
ts
import { fetchEventSource } from "@microsoft/fetch-event-source";
import { type OryxChatFetcher } from "@contextualai/oryx-react";

/**
 * The chat fetcher, for query streaming.
 * Please check the notes above for the guide on the URL.
 */
const fetcher: OryxChatFetcher = async (request, handlers) => {
  await fetchEventSource("/query-endpoint", {
    method: "POST",
    headers: { "Content-Type": "application/json" },
    body: JSON.stringify({
      messages: request.messages,
      conversation_id: request.conversationId,
      stream: true,
    }),
    onopen: handlers.onOpen,
    onmessage: handlers.onMessage,
    onerror: handlers.onError,
    onclose: handlers.onClose,
    // Signal is for handling the aborting of the request.
    signal: handlers.signal,
  });
};
Step 3: Wire up Oryx to your fetcher
After creating a fetcher with your preferred SSE library, you can connect it to Oryx to start streaming conversations directly into your UI, in just a few lines of code.
Keep in mind that this is a very minimal working example, without showing retrievals, and entirely unstyled.
tsx
"use client";

import { Oryx, useOryx } from "@contextualai/oryx-react";

export function Chat() {
  const { probe, start } = useOryx({ fetcher });

  return (
    <Oryx.Root probe={probe}>
      <button type="button" onClick={() => start("Explain this code.")}>
        Ask
      </button>

      <Oryx.Messages.List>
        <Oryx.Message.User />
        <Oryx.Message.Agent render={(content) => <p>{content}</p>} />
      </Oryx.Messages.List>
    </Oryx.Root>
  );
}
- To render retrieved evidence and document previews, see retrievals for guidance.
- For programmatic control like starting conversations from effects or stopping requests, see advanced usage.
- To structure and style a complete interface, see composition guide and styling guide.
Step 4: Proxy the API for production
This step is optional for local development and is strongly recommended in production for security reasons.
It's the best practice to proxy API requests through your own server in production. This allows you to enforce authentication, rate limiting, and other security policies when exposing Contextual AI agents to your users — and keeps your API key safe from client-side exposure.
The only exception is when using OIDC (available for enterprise plans, contact us). In that case, you can securely pass the OIDC token directly in the fetcher header, though you may still use a proxy if preferred.
We provide a Node.js (TypeScript) proxy example compatible with any JavaScript runtime. You can adapt it to other languages or frameworks as needed.
bash
pnpm install @contextualai/oryx-proxy-node
In Next.js, a single function call now exposes a POST endpoint that streams responses from Contextual AI directly to your frontend. For advanced scenarios like dynamic routing or custom error handling, see proxy customization.
ts
import { createOryxSSEProxy } from "@contextualai/oryx-proxy-node";

export const POST = createOryxSSEProxy({
  baseUrl: "https://api.contextual.ai",
  transform: (request) => ({
    url: `/v1/agents/${process.env.CONTEXTUAL_AGENT_ID}/query`,
  }),
  extendHeaders: (request) => ({
    // `request` argument is the incoming request.
    // Any authentication logic could be added here.
    Authorization: `Bearer ${process.env.CONTEXTUAL_API_KEY}`,
  }),
});
Appendix: Directory
- Retrievals — Render retrieved evidence and document previews.
- Intermediate Steps — Render tool calls, thinking steps, and workflow progress.
- Composition Guide — Structure your chat UI with Oryx primitives.
- Styling Guide — Style your Oryx with Tailwind, CSS modules, or any CSS approach.
- Proxy Customization — URL routing, header injection, and error mapping.
- React Hooks — API reference for all React hooks.
- Advanced Usage — Programmatic control, status hooks, and message metadata.
We have also prepared a complete working example to get you started quickly. Hope you enjoy it!
© 2025 Contextual AI, Inc.
Proudly open sourced under the Apache 2.0 license.